Thimbleanna

How-To

A Bucket Bag

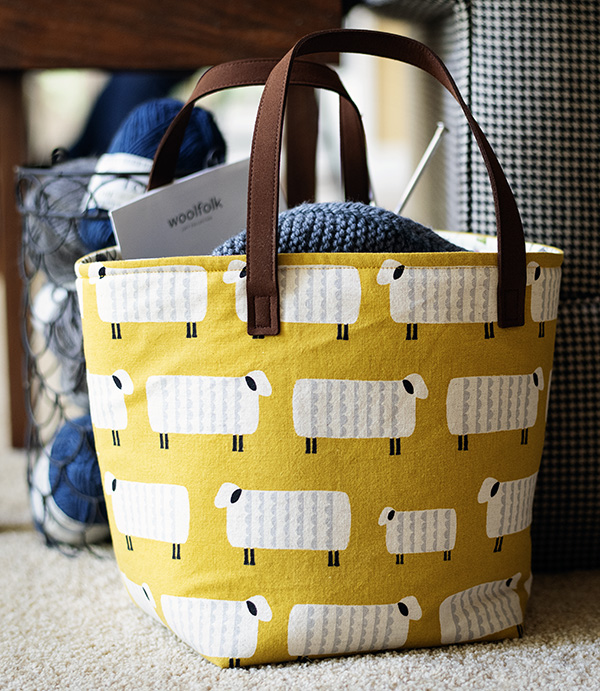
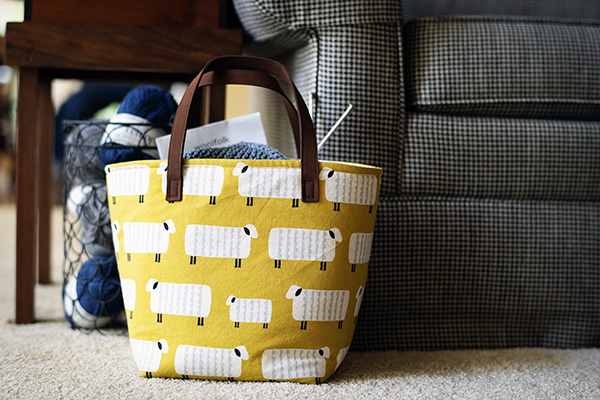
Once Upon A Time Ago, I saw a big roomy bag at a market that I thought would be perfect for my knitting.  The problem was, that it had a big roomy price tag.  Gee, I didn’t want the bag to cost as much as the yarn I planned to put in it, so I filed the vision of that lovely bag in my head for another day.  Not too long after that, I found a sheepy fabric that I thought would be perfect for such a project bag, so I bought it and hung it on the wall to nag me into making a perfect little knitting bag.  And nag me it did — for an embarrassing number of years.  Finally, last weekend, I thought “this is ridiculous”, so I took down the fabric and made my bag.  And it was ridiculous that I’d waited so long — it only took a few hours to make.  Why do some of the smallest jobs seem to take so long to get around to executing?

Thimbleanna: Bucket Bag

Anyway, it’s done and I LOVE it and I took pictures along the way, so I could tell you how I made it.  (And so that I would have notes, should I ever want to make another bucket bag — and surely I will!)

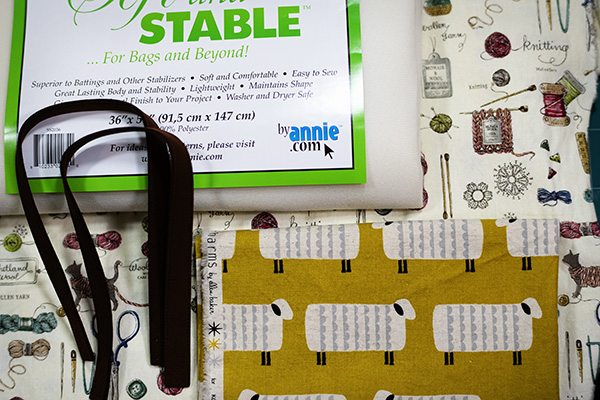
Here are the things you will need for a bucket bag that will be approximately 17″ wide x 11″ tall x 8″ deep:

Thimbleanna: Bucket Bag

  • One 15 1/2″ x 34 1/2″ piece of Soft and Stable (I use this on most of the bags I make — it’s amazing and it gives your bag some stability — no one wants a floppy bag!)
  • One 15 1/2″ x 34 1/2″ piece of cotton or cotton canvas for the outside of the bag.
  • One 15 1/2″ x 34 1/2″ piece of cotton or cotton canvas for the lining of the bag.
  • One 8 1/2″ x 11″ piece of lining fabric for an inside pocket.
  • One 8 1/2″ x 11″ piece of fusible interfacing for an inside pocket.
  • Two leather bag straps approximately 20″ long.

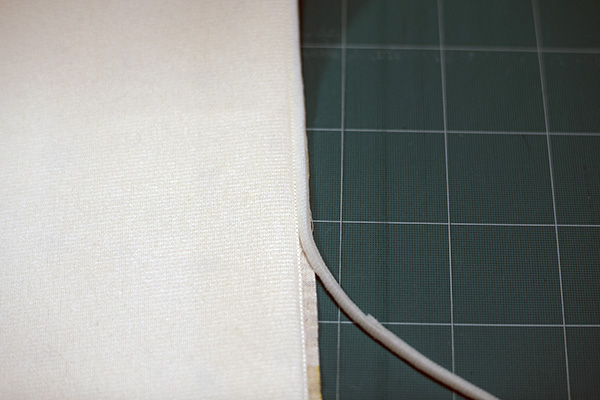
Place the piece of soft and stable on top of the wrong side of the outside bag piece of fabric and sew a very scant 1/4″ seam all the way around the rectangle. Then trim the soft and stable in the seamline as close to the stitching as possible.  Set aside.

Thimbleanna: Bucket Bag

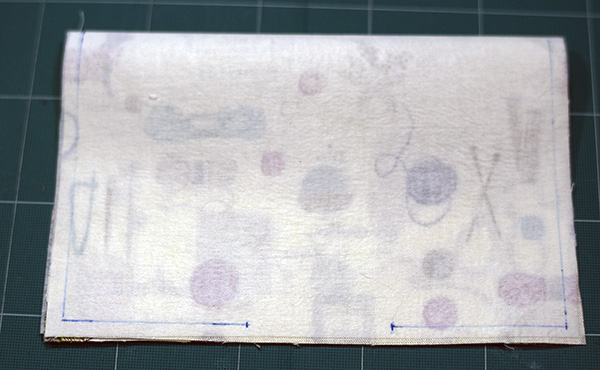
Iron the fusible interfacing to the wrong side of the 8 1/2″ x 11″ piece of pocket fabric.  Then fold the fabric width-wise and stitch around the three seam sides, leaving an opening for turning the pocket in the middle of the long side of stitching.

Thimbleanna: Bucket Bag

Trim the corners, turn the pocket, and fold the raw edges along the bottom of the pocket opening toward the inside of the pocket.  Press the seams so they are nice and flat.  Lay the lining fabric out, right side up, so you’re looking at a horizontal rectangle.  Place the pocket 4 1/2″ in from the left hand side of the rectangle and 4 1/4″ up from the bottom of the rectangle.  (Or, you might like your pocket a wee-bit higher on the inside of your bag — I think 5 ” from the bottom would have been a great distance too.)  Sew the pocket to the lining along the right, bottom and left sides, leaving the top open.

Thimbleanna: Bucket Bag

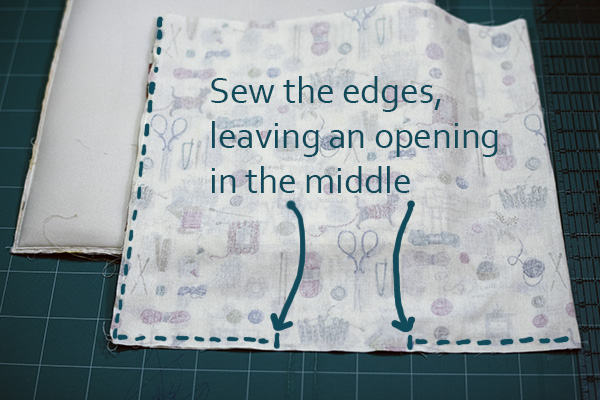
Fold the outside piece of fabric with the attached soft and stable and stitch a generous 1/4″ seam along the side and the bottom of the bag.  You will now have a rectangle that measures 15 1/2″ x 17 1/4″ that is open along the top, sewn closed along the bottom and one side, and folded on the other side.  Iron the seams open where possible.  Repeat this step with the fabric lining, except you will need to leave an opening along the bottom seam (the 17 1/4″ side) for turning later.

Thimbleanna: Bucket Bag

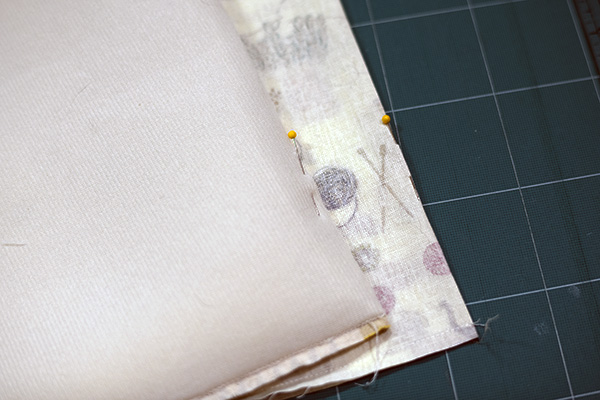
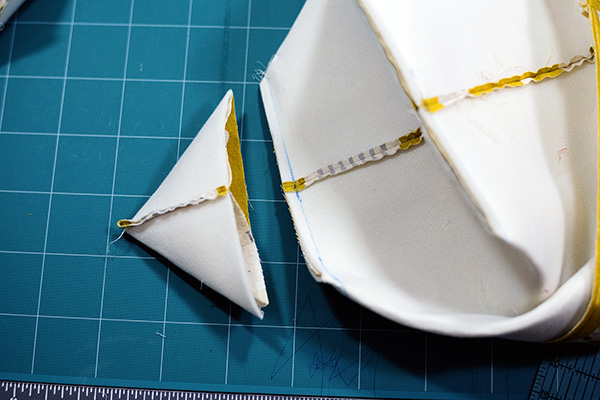
Now you’re ready to box-out the corners of your bag.  It’s tricky to explain, but not really that hard.  Hopefully the pictures and words together will help.  Also, reading through the next few pictures before you do anything might help make it more clear.  On both the lining and the outside of the bag, place a pin along the edge of the folded side, a few inches from the seamline along the bottom of the bag.

Thimbleanna: Bucket Bag

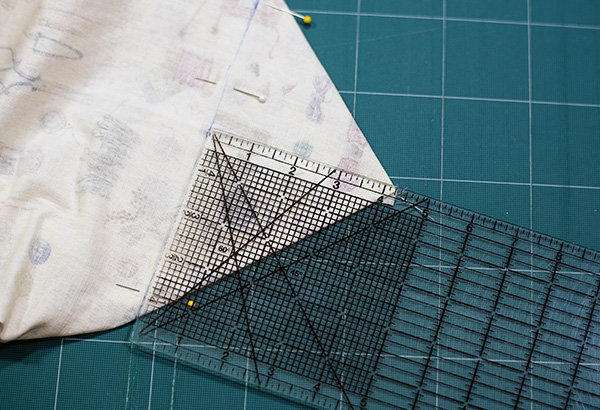
Now, using the lining piece of fabric, open up that bottom corner and place the pin you just placed in the fold, along the seamline in the bottom of the lining.  You have to feel it with your fingers — you’re re-folding the corner so that the folded side edge runs along the bottom seam.  You’re going to do the same thing in the other corner of the lining, except the side edge of that corner was seamed instead of folded, so you’re going to be lying the two seams on top of each other, right sides together.  Once you have the corner re-folded, measure up 4 1/4″ from the point and then draw a diagonal line that is 4 1/4″ from the corner point.  It’s very important to make sure that the diagonal line is perpendicular to the seamline of the bottom of the bag.

Thimbleanna: Bucket Bag

Stitch along that drawn line.  After you’ve completed both corners of the lining, do the same thing for the main soft and stable piece of the bag.  Then trim all corners off of the bag and lining.

Thimbleanna: Bucket Bag

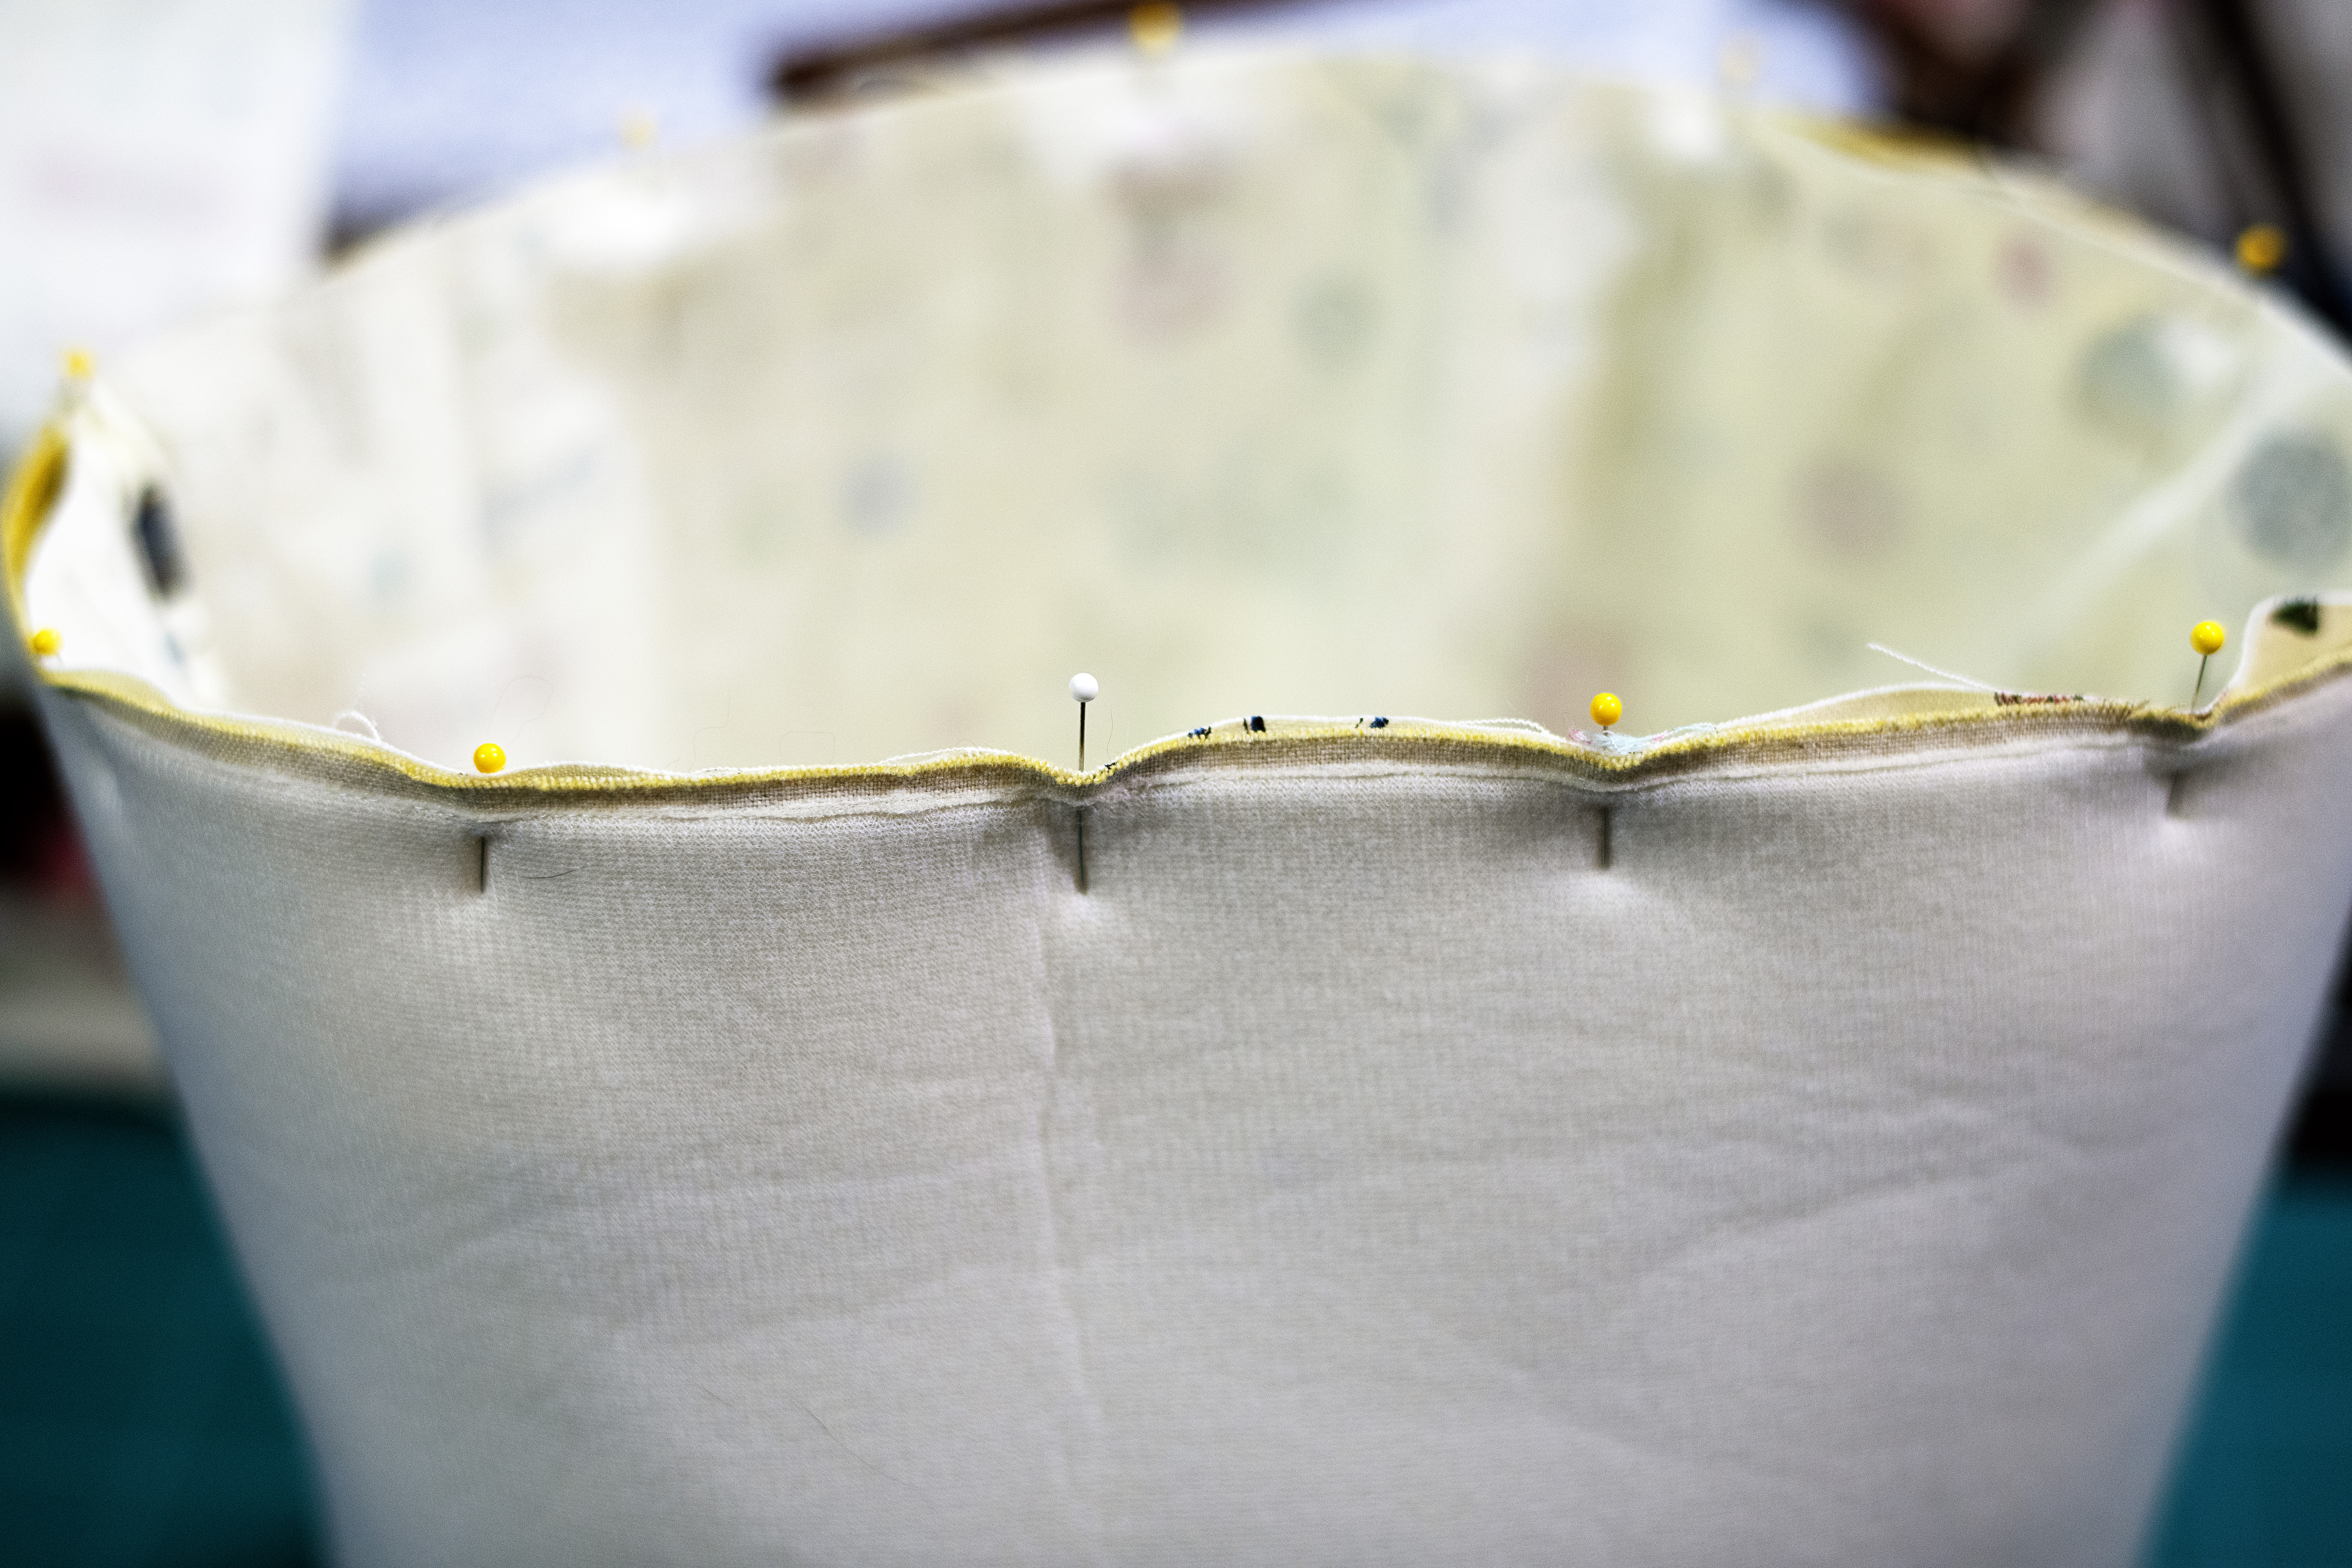
Like magic, you can now stand them up and they have their boxy shape!  Turn the lining right side out and place it inside of the bag with the soft and stable, right sides together.  Pin or clip all around the top of the bag, matching the side seam and the folded edge of the lining to the side seam and folded edge of the bag.  Then stitch a generous 1/4″ from the top edge, all around — don’t leave any openings.

Thimbleanna: Bucket Bag

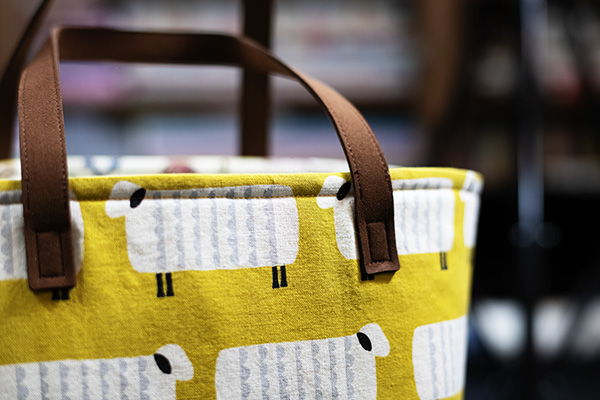
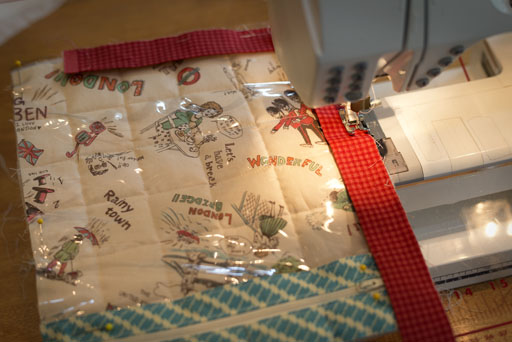
Remove pins or clips and turn the bag through the opening in the bottom of the lining.  Hand stitch that opening closed.  Press along the top edge of the bag and then topstitch 1/4″ from the edge.  Then, attach your bag handles according to manufacturers directions.  (Mine were sewn on, some are put on with rivets or snaps, etc.)

Thimbleanna: Bucket Bag

Ta-Da!  You have a perfect little bucket bag, perfect for stuffing full of whatever project you’re working on.

Thimbleanna: Bucket Bag

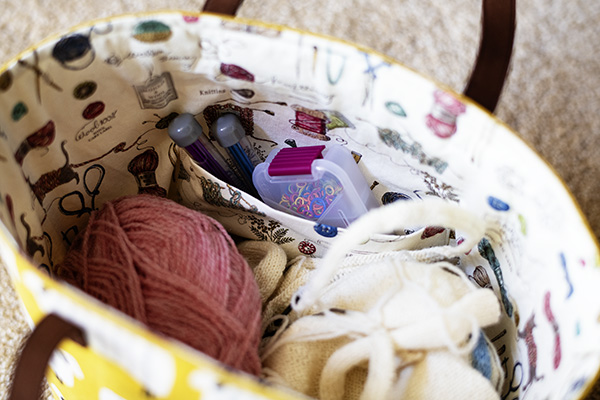
Hurry and put something in there and admire your handy work!

Thimbleanna: Bucket Bag

That wasn’t too bad was it? I hope it wasn’t too confusing. If you have any questions, feel free to ask. I really do need to go work on that little project I stuffed into my bucket bag — you won’t believe how old it is — I think it might be the oldest ufo in my house and I think it’s older than my oldest child — an embarrassing Eeeek!

XOXO,
Anna

Vinyl Project Bag

After I posted about my little vinyl project bag a few weeks ago, I had a few questions about how I make them, so I promised I’d post some details.

Before we get started though, a few disclaimers. I’ve been seeing these little bags pop up in a lot of places, so this is nothing new.  If you’ve been sewing for very long, you’ll easily be able to figure this out for yourself. There are lots of different (and probably better) ways to do the various steps — this is just how I do it, so if my methods don’t work for you, just remember that google is your friend. Especially where the zipper is concerned — there might be a method out there that works better for you.

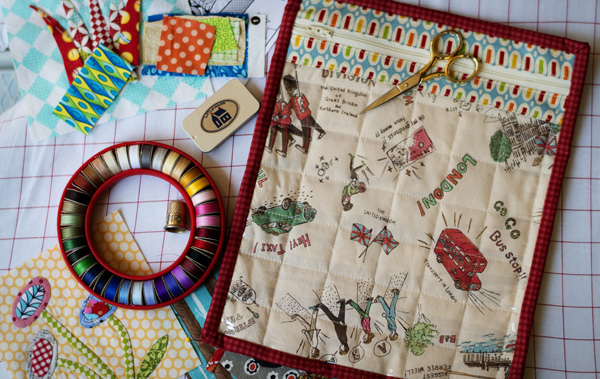
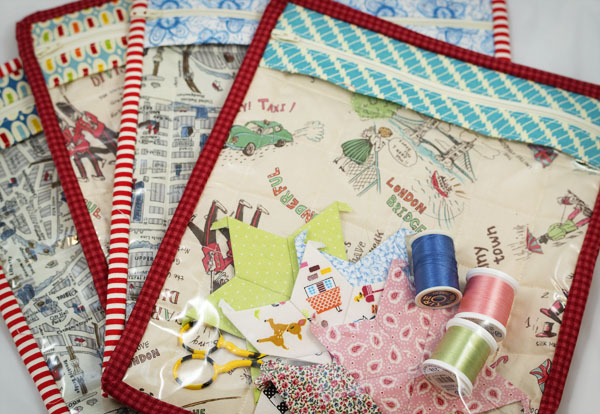
So, in case you’ve forgotten, this is what we’re making (the bag, not the blocks). ;-D

Thimbleanna:  Vinyl Project Bag

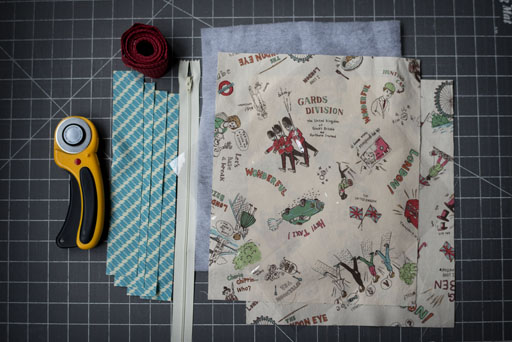
Here’s what you’ll need:

Thimbleanna:  Vinyl Project Bag

  • 2 – 10″ x 12″ pieces of fabric (the back of the bag)
  • 1 – 10″ x 12″ piece of batting (or flannel or soft and stable or whatever, depending on how firm you want the back of your bag)
  • 4 – 10″ x 1 1/2″ pieces of fabric (the prints on either side of the zipper)
  • 1 – 10″ x 10″ piece of vinyl
  • 1 zipper — longer than 10″ (I used 14″ because that’s what I had in my stash)
  • Approximately 55″ of 2 1/2″ wide binding folded in half and pressed

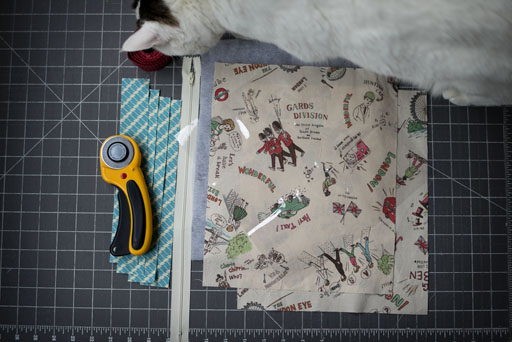
Cats are optional.

Thimbleanna:  Vinyl Project Bag

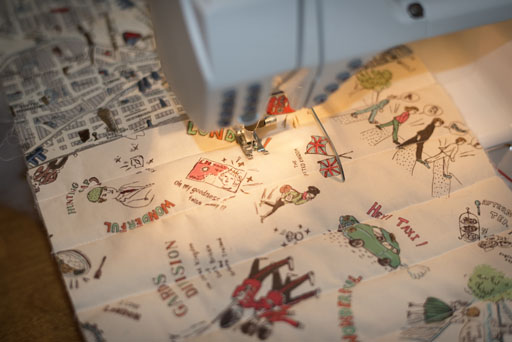
The first step is to prep the back.  Place one of the 10″ x 12″ squares of fabric, wrong side up, on your table.  Place the batting on top of it and then place the other piece of 10″ x 12″ right side up on top of the batting.  You’ve made a quilt sandwich that will be the back of the bag.  I like to quilt this sandwich and you can quilt it however you like — stippling, straight stitches, mattress style, etc.  I chose to quilt a grid, starting in the middle and then stitching a few lines on either side of the middle line.  In the picture below, you’ll notice map fabric behind the piece I’m quilting — I’m just quilting several back pieces at once.  If you’re going to make one vinyl bag, you might as well make several at once!

Thimbleanna:  Vinyl Project Bag

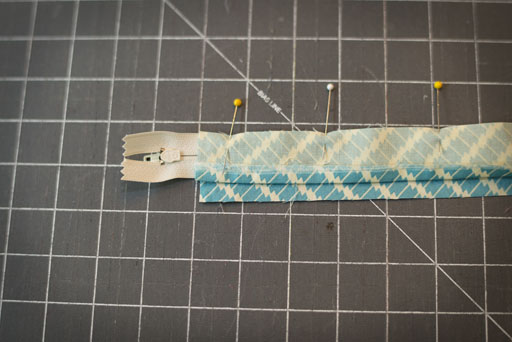
Now, take one of the 10″ x 1 1/2″ strips and turn one long edge under 1/4″ and press.  This step is optional, but I think it makes it easier later.  Then, take the zipper and sandwich one edge of it between the right sides of two of the 10″ x 1 1/2″ strips of fabric.  Pin or glue, whichever works for you.  And make sure that the piece with the pressed 1/4″ edge is on the back side of the zipper.

Thimbleanna:  Vinyl Project Bag

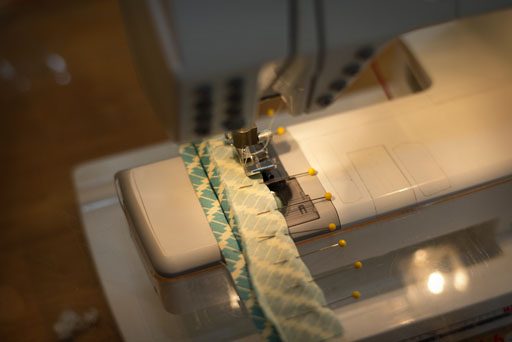
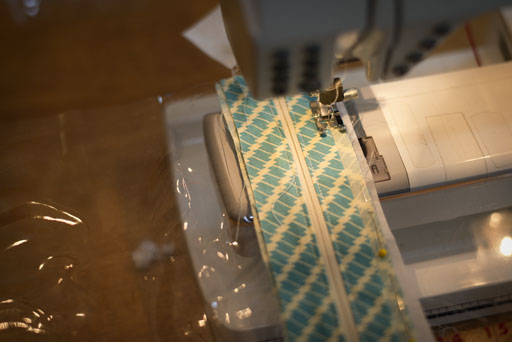
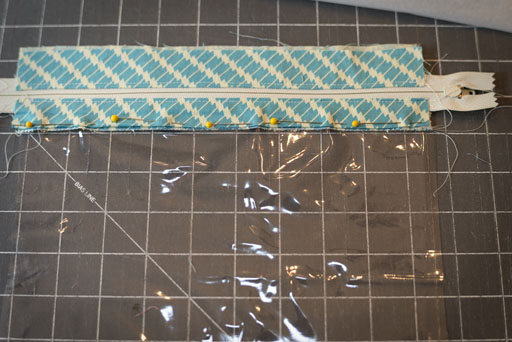
If you’re a zipperphobe, don’t quit now!  Take your little zipper sandwich to the machine and stitch a 1/4″  seam.  Be sure you have your zipper foot on your machine.  And you’ll notice that there are more pins in the zipper sandwich now that we’re stitching — my top fabric was slipping, so I added more pins.

Thimbleanna:  Vinyl Project Bag

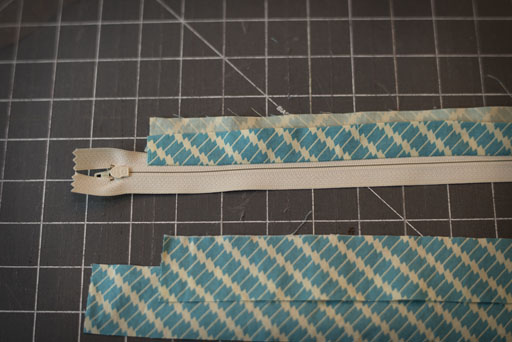
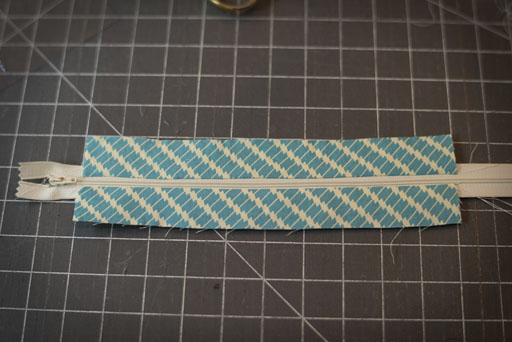
Press the two pieces of fabric open — or so that they have their wrong sides together.

Thimbleanna:  Vinyl Project Bag

Repeat those steps on the other side of the zipper with the other 10″ x 1 1/2″ pieces of fabric.

Thimbleanna:  Vinyl Project Bag

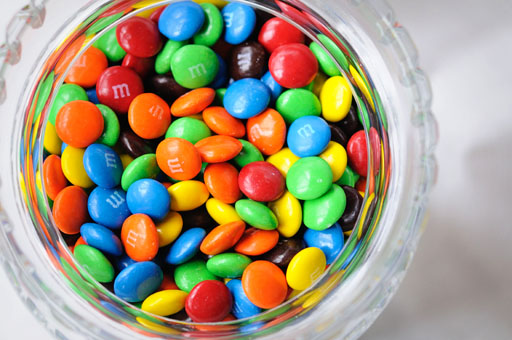
Ta – Da!  Zipper in fabric!  ;-D  I forgot to take a picture of this next step, but, from the right side, top stitch close to the edge of the two seams that you just sewed.  (You can see the top stitching in future pictures.)  Reward yourself with some chocolate.  Preferably M&Ms from a crystal dish — a little elegance makes them taste better!

Thimbleanna:  Candy!

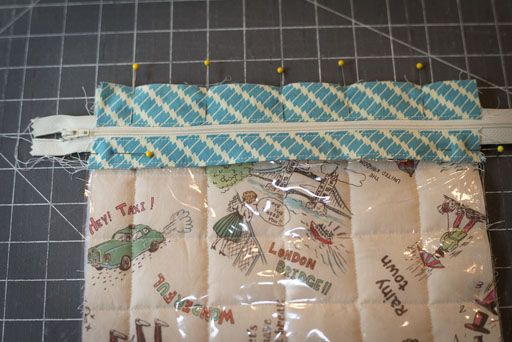
Now it’s time to sew the vinyl to the zipper piece.  With the zipper facing right side up, place the vinyl on top of the zipper piece with one edge of the vinyl along the unfinished edge of the fabric that is on top of the piece with the 1/4″ pressed edge.  That’s hard to explain — hopefully it made sense.  Now, flip the piece over and pin the fabric to the vinyl, being sure to keep your pins horizontal and close to the edge — the area that will be part of the seam.  If you pin farther away from the edge, you’ll be able to see holes in your vinyl after you sew the seam.  Take this fabric to your machine (regular foot or 1/4″ foot should be back on machine now) and sew a 1/4″ seam.

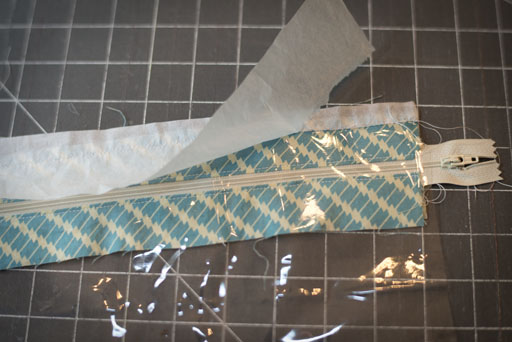
At this point, we need to discuss the vinyl.  It’s difficult to sew directly on vinyl because it’s sticky.  For this seam, the vinyl will be face down, against the feed dogs.  In order to keep things moving smoothly, I use scraps of tissue paper between the machine bed and the vinyl.  You stitch through the tissue paper just as if it were meant to be part of the bag.

Thimbleanna:  Vinyl Project Bag

After you’re done, peel the tissue paper off of both sides of the stitching line.

Thimbleanna:  Vinyl Project Bag

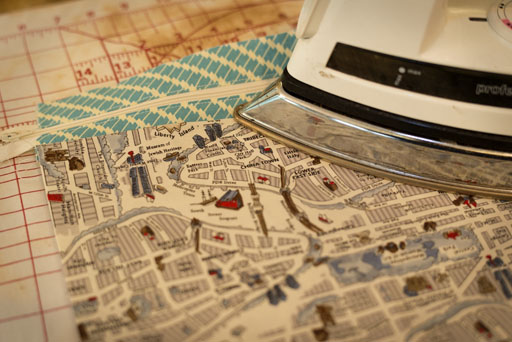
Then fold the vinyl seam toward the zipper and press on the right side of the fabric.  Two things to note here: a) ignore that ugly water stain on my little pressing board, and b) if you put that hot iron directly on your vinyl you’ll have a hot mess.  Haha — sorry for the pun.  But really, DO NOT put the hot iron directly onto the vinyl.  I just grab a fabric scrap or a flour sack towel or something to place between the vinyl and the iron.  Another thing you don’t want to do is leave the iron sitting there while you take a picture.  It won’t melt the vinyl, but it makes it a wee bit wrinkly.  ;-D

Thimbleanna:  Vinyl Project Bag

Ok, moving on.  Flip the zipper concoction so that the wrong side is up.  Here’s where having that 1/4″ seam folded over and pressed comes in handy.  You might have to adjust it a little, but place the folded edge up against the vinyl seam and pin.  I really wanted to glue here but I knew that the glue wouldn’t work on the vinyl.

Thimbleanna:  Vinyl Project Bag

Now … dang it!  I forgot another picture!  Anwway, flip the zipper concoction right side up and go to the machine and top stitch along that edge that you just pinned.  Your pins will be hidden under your piece, against the throat plate, so sew slowly and remove the pins as you go.

Now you’re ready to attach the front vinyl piece to the back piece that you quilted earlier.  Lay the vinyl piece, zipper right side up, on top of the quilted piece.  You may need to trim up the edges and then pin them in place.  And remember, if you’re going to pin along the vinyl, only pin very close to the edge, in the area that will eventually be part of a seam.

Thimbleanna:  Vinyl Project Bag

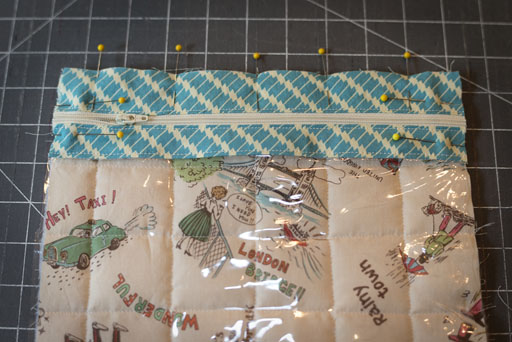
Now, it’s time to trim the zipper.  Be sure you’ve pinned securely on both sides of the zipper.  Take a deep breath and have some more M & Ms.  And ALERT!  Be sure your zipper pull has been pulled so that it’s on top of the quilted backing.  (If you leave the zipper pull out on either edge of the zipper, you’re going to have way more than a hot mess and you’re going to be saying a LOT of bad words.  I don’t know this from personal experience, but I have a vivid imagination.)  Cut the edges off of the zipper.  Rotary cutter or scissors, whatever works for you.

Thimbleanna:  Vinyl Project Bag

Now, bind your little bag, just like you would bind a quilt.  I’m not going to tell you how to do that part, there are a bajillion tutorials out there on the web.  I like to attach the binding by machine to the right side and then sew the binding to the back side by hand.  If you can make yours all by machine and have it look great then go for it!

Thimbleanna:  Vinyl Project Bag

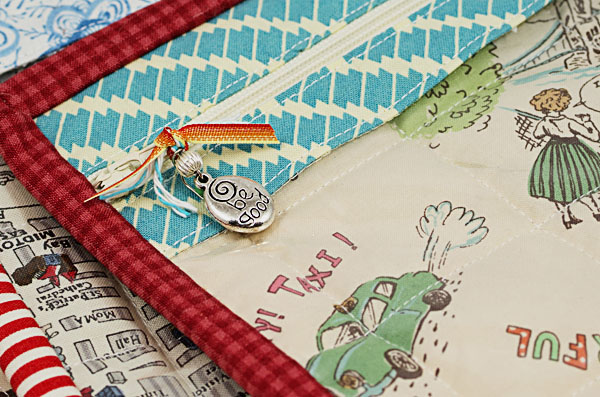
And there you have it — finished vinyl zipper bags!  I love these little bags for hauling around my handwork.  Knitting too — next up, I’m going to make some bigger bags.  They keep all my work clean and tidy while it rambles around on the inside of my backpack.  (Oooh, and see how the edge where the vinyl meets the fabric attached to the zipper looks a little wobbly?  That’s because I stopped to take that vinyl-pressing picture a few steps back.  It’s hardly noticeable in real life, but just thought I’d point it out.  Also, can we just have a moment of silence to appreciate how those zigzags on the blue print on either side of the zipper lined up???  They’re a wee-bit off, but I couldn’t have planned that better if I’d tried!  I love a happy accident and I attribute it to the heavy consumption of M&Ms.)

Thimbleanna:  Vinyl Project Bag

One last thing — don’t forget to embellish your zipper pull — there are lots of fun things you can do with it!

Thimbleanna:  Vinyl Project Bag

Now, go forth and make Vinyl Project Bags.  And eat M&Ms.  It’s Fun!

Have a Wonderful Weekend!!!

XOXO,
Anna
Merry Christmas!

It’s He-e-e-e-re.  It’s Here It’s Here It’s Here!!!  Are you ready?  I’m having my traditional Christmas Eve morning breakfast. Yummmmmm!

Thimbleanna: Christmas

It was a busy weekend here in ThimbleannaLand — we had the gingerbread contest and my oh my, we had some stiff competition this year.  It was great fun and as soon as we make it past the festivities of the next few days, I’ll get through the pictures and have a full report.  In the meantime, here’s a little sneaky peek.

Thimbleanna: Christmas

Ok, zippity zip. I must dash to the dungeon — in true Christmas spirit, I still have a few hours of super secret sewing to do, followed by some cooking and then Christmas Eve with everyone in the family except for the boys and SweetiePie. ;-( We had a fun Christmas with TheSecondChild and his girlfriend over the weekend, and we’re looking forward to seeing TheFirstChild and SweetiePie next week.
I hope you all have a Merry, Merry Christmas. I know you’ve all been good little quilters and knitters and crafty kids this year and I hope Santa is very, very good to you!  (Don’t forget, you can track his progress and see how many gifts he’s delivered on the cute Norad website.)

XOXO,
Anna
Jumbo Applecore, Part 3 of 3

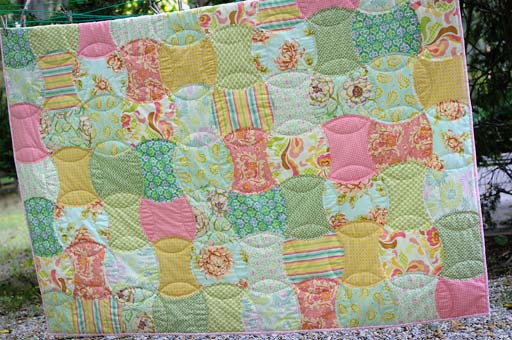
Thanks for all the Applecore quilt love! This is really a pretty easy quilt to put together, if you get the template right. The trick is to get the length of the convex curve to match the length of the concave curve.

Applecore Quilt

The very easiest way to make an applecore quilt is to buy your applecore pieces already cut out for you. But, that’s not always practical — you might want to use your own scraps, or you might want to make an applecore quilt in a size that’s not available in pre-cut pieces. The next easiest way is to buy a plastic template, but you still have the issue of templates probably not being available in all sizes. So, for my money, the best way is to make your own template. Some of you probably already know how to do this (Annalea spelled it all out just the way I do it, except for the last few steps, in the comments section of part 2!), but for those of you who don’t know how, here are a few pictures to help you along.

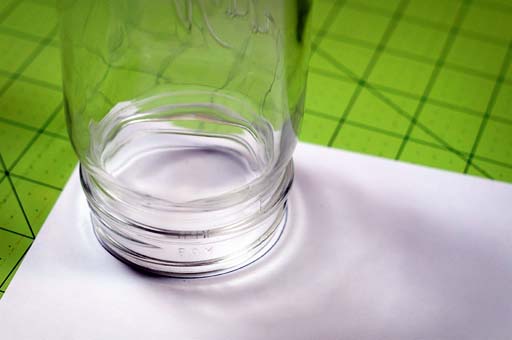
First, you have to determine how long you want your applecore to be.  (My jumbo applecore was a little over 10″ long.)  Then find a circle that has a diameter equal to that length.  Look all around you for circles — cans, dinner plates … heck if you want a really jumbo applecore, run outside and trace the circumference of a car tire!  For our little sample, I’m using a canning jar.  (And please ignore my funny green cutting mat and try to remember that I sew in a dungeon — thus, no natural light!)

Applecore Quilts

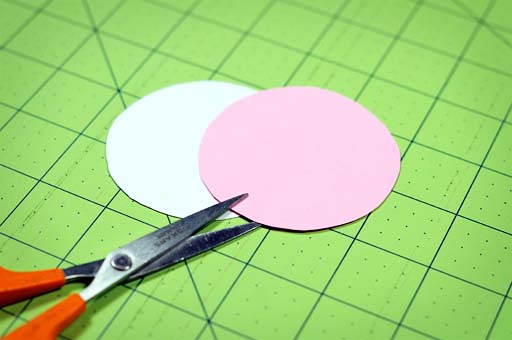
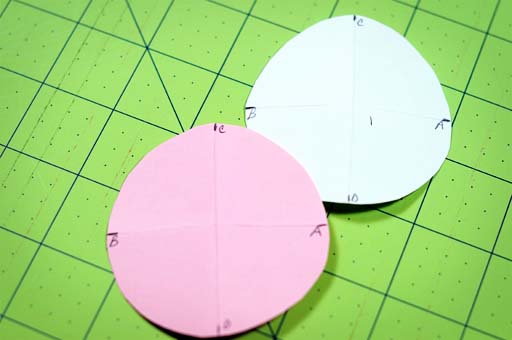
Trace around the jar and cut out your circle.  Then make another identical circle — I’m using a different color of paper to make it easier for you to see what we’re doing.

Applecore Quilts

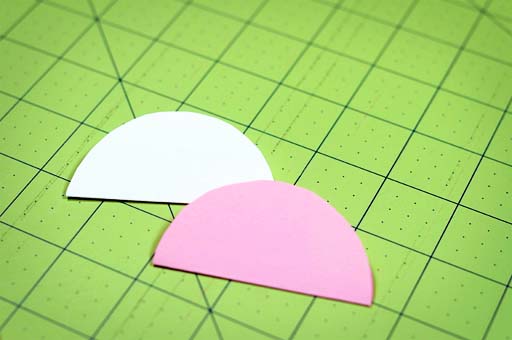
Fold both circles in half.

Applecore Quilts

Unfold your circles and label the endpoints of each line.  This step isn’t really necessary — again, I’m trying to make it a little easier to explain this process.

Applecore Quilts

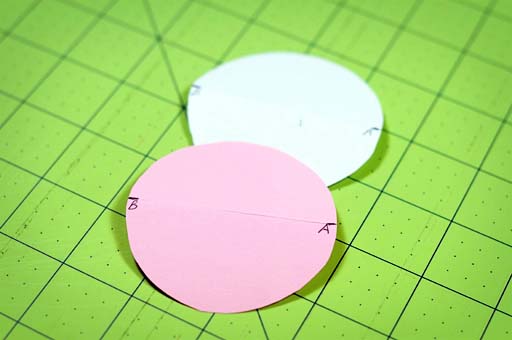
Fold the circles in half again, by bringing the A to touch the B, and mark the endpoints of the new lines.

Applecore Quilts

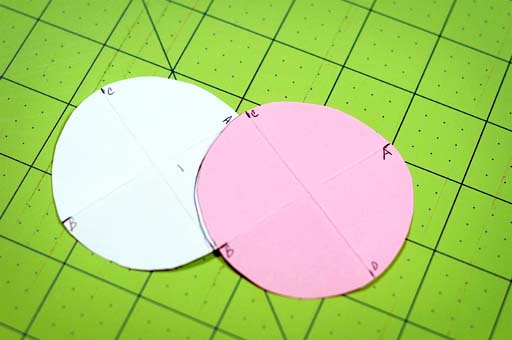
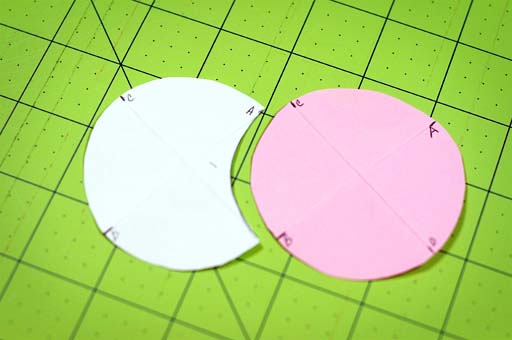
Now, your circle is divided into 4 equal sections.  Place the pink circle on top of the white circle and match up the white A to the pink C and the white D to the pink B.  You can match up any group of points, as long as your circles look like the ones in this picture and your folded endpoints are touching.  Then trace the curve of pink C to pink B onto the white circle.

Applecore Quilts

Cut the white circle on the traced arc.

Applecore Quilts

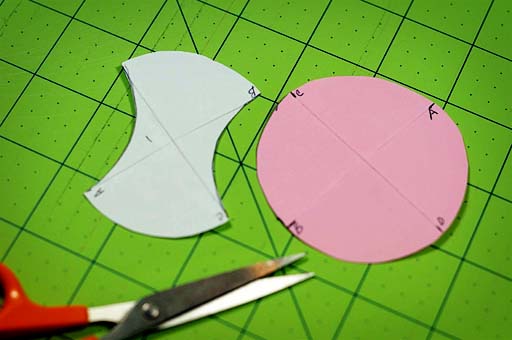
Repeat this process for the other side of the circle and voilà, an applecore!

Applecore Quilts

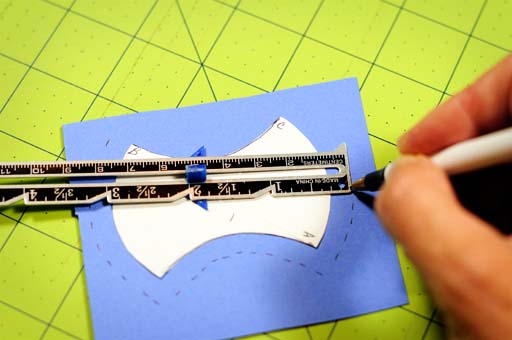
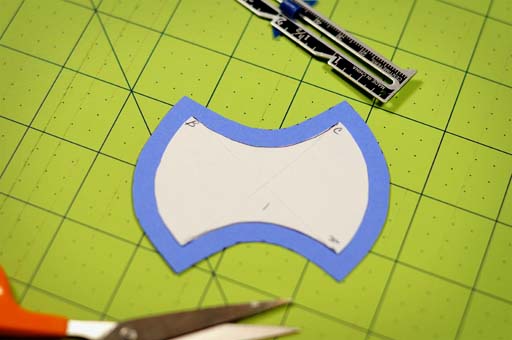
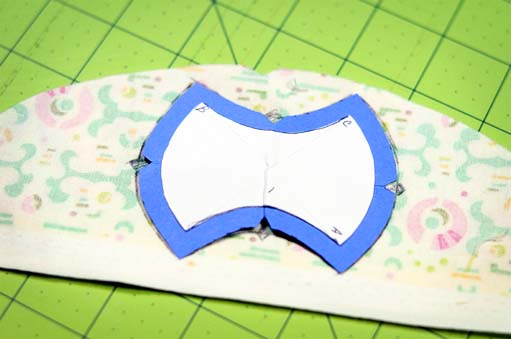
Now, the most important part — you have to add your 1/4″ seam allowance.  Glue your template to another piece of paper and mark a 1/4″ seam allowance on all sides of the applecore.

Applecore Quilts

Cut along this new line and and voilà again … a template!

Applecore Quilts

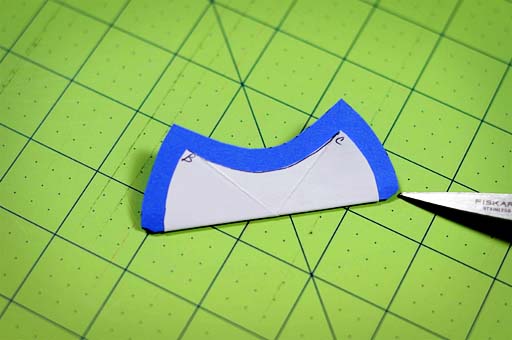
One more thing that I find very helpful is to mark the center points on each arc, so that you can match them up when sewing.  Fold your applecore in half lengthwise and clip a little v into the edge of the template on each end.

Applecore Quilts

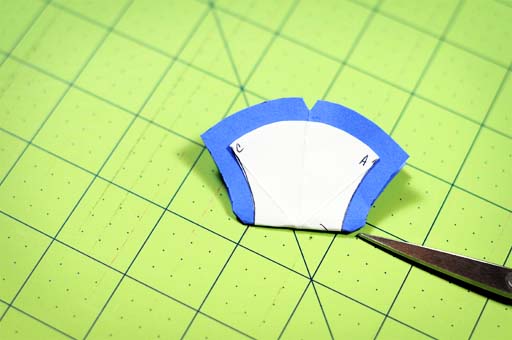
Repeat this process for the concave sides of the applecore.

Applecore Quilts

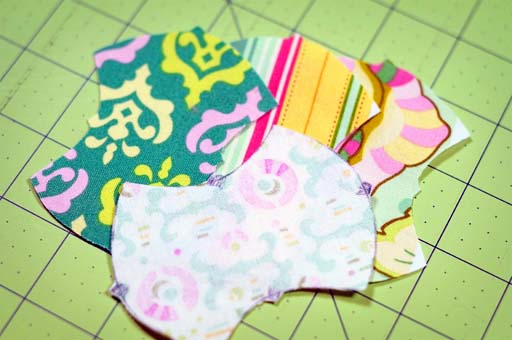
Your template is ready to use!  Now, I know … those of you in the zoom, zoom age of rotary cutters aren’t going to want to have to deal with this old fashioned template method.  “But, it takes too long” — I can hear you now.  Quit yer whinin’!  Expand your horizons!  This way really can be fun and even … dare I say it … relaxing.  Trace around your template, onto your fabric, being sure to mark those midpoints.

Applecore Quilts

My jumbo applecore has 90 pieces in it — I traced and cut on 4 layers of fabric at a time and it only took me about 90 minutes to get them all cut out.  So, here are our little samples.

Applecore Quilts

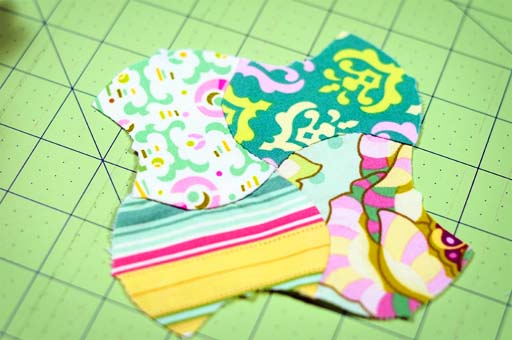
And here they are all sewn together.

Applecore Quilts

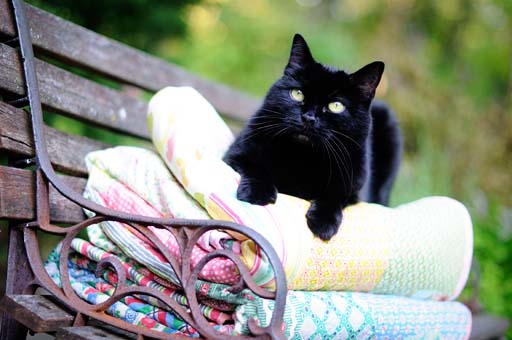
So, there you have it, in case you’re interested in making an applecore quilt in any size.  And if you’re really lucky, when you’re all done, your quilt will be kitty cat approved!

Applecore Quilts

XOXO,
Anna
A Purse Thingy

So, how was your weekend?  Mine was fun, but exhausting.  I decided to go and visit TheSecondChild on Saturday.  It’s a six hour drive, so I got up early and I was down there by noon.  I made a quick fabric shop stop and then TheSecondChild and I had a little lunch.  Then we had a fun-filled afternoon of cleaning the house he lives in with 2 other 22-yr. old pigs guys.  They had the clutter pretty well picked up, but boy, was it ever dirty.  While we were cleaning, TheFirstChild and SweetiePie called to say they were on their way home from spring break in a crowded vehicle of seven people and would I mind meeting them on the road (we were traveling the same route) so that they could move to my car and then I would take them home?  I was happy to have some travel time with them, but since we didn’t meet up until 10 p.m., we didn’t get to their place until 5 a.m. on Sunday morning.  I slept there for about 4 hours and then came home.  I’m getting too old for that college behavior!
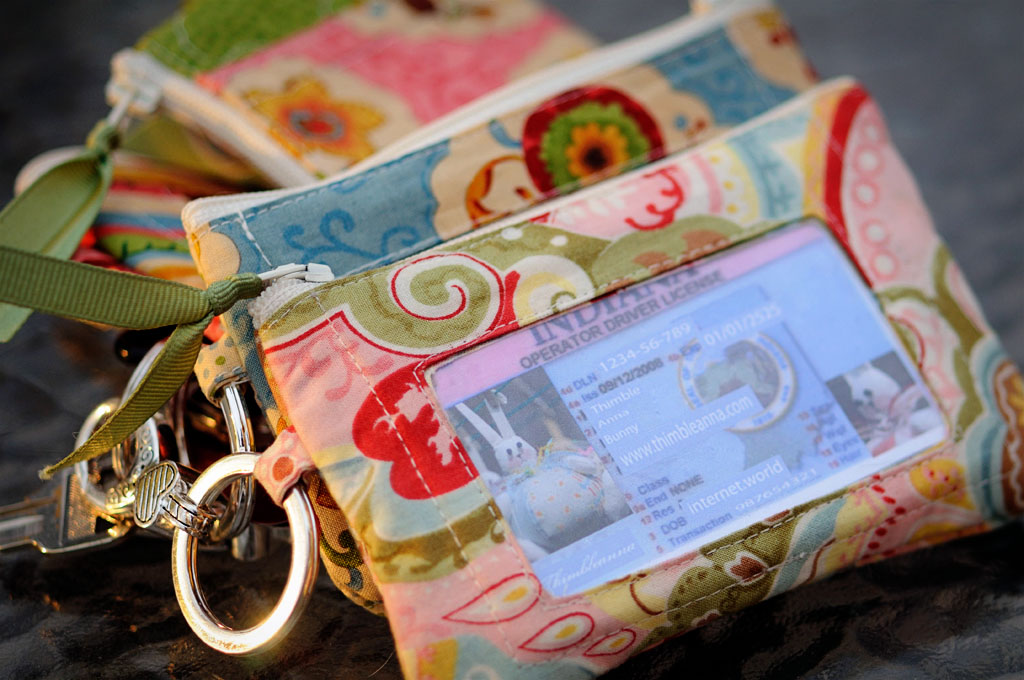
Anyway, last week. before all that excitement, I had fun making some little keychain cell phone id coin whatever-else-you-want-to-throw-in-there purses.  I’ve seen little fabric/vinyl purses like this in the stores and I thought it would be fun to make some of my own.  I’ve been using mine for about a week now and I love it for the times when I just want to run a quick errand (not to mention how convenient it is to just pull my id purse out of my pocket instead of rummaging through my big wallet when I’m in the airport.)  Plus, I figured they will make nice little gifts for new graduates, bridesmaids, etc. now that spring is here.

Key Chain Purse

They’re pretty easy to make and I thought you might like to make some too, so I took some pictures of the process and thought I’d write a little tutorial.

Key Chain Purse

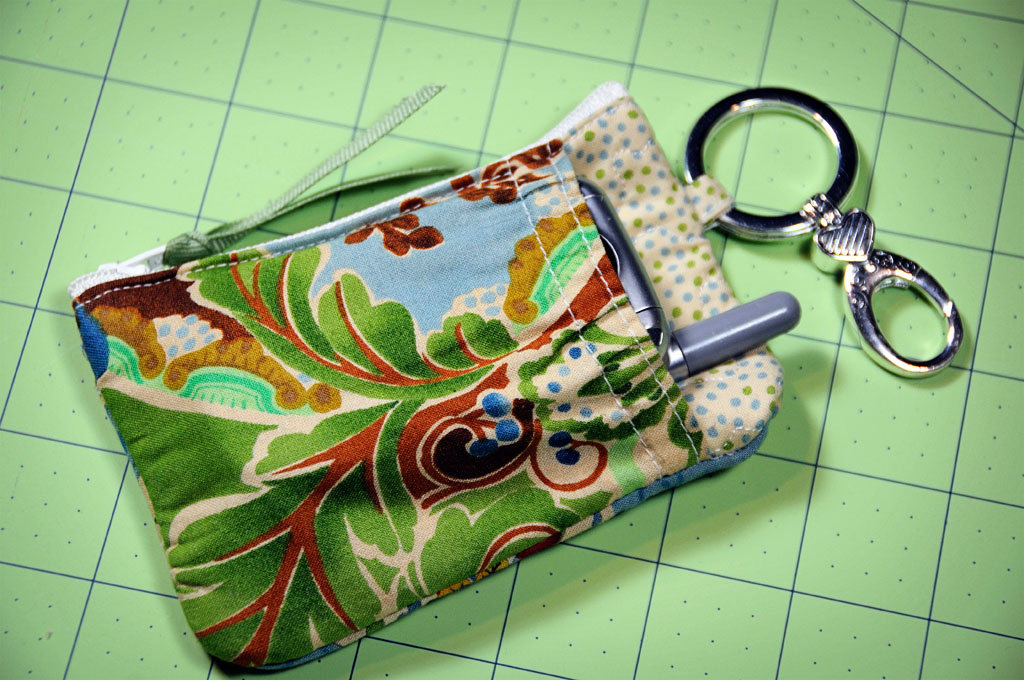
Here’s a shot of the back of the purse with my cell phone tucked into the little pocket.

Key Chain Purse

So, shall we start?  Here’s a picture of what you will need:

Key Chain Purse

Some scraps of fabric — I used three different prints.  You can use more or less, however you want your little purse to appear.
One 7-inch zipper.
One 3 1/4″ x 5 1/2″ scrap of quilt batting or heavy fabric like flannel.
One 3″ x 5 1/2″ piece of Heat and Bond or Wonder Under double sided fusible.
One 2 1/2″ x 3 3/4″ piece of vinyl.
One 6″ long piece of 1/2″ wide steam-a-seam.
One 3 3/4″ long piece of 1/4″ wide elastic.
One 5″ piece of coordinating ribbon for the zipper pull.
One keychain ring.  The ones I used came from Michael’s craft store.

Purse Back: Cut a 7″ long x 5 1/2″ wide piece of fabric.  Place the scrap of flannel on one end of the wrong side of the fabric and fold the other end over the top of the flannel.  This will sandwich the flannel in between the larger piece of fabric.

Key Chain Purse

Quilt this little sandwich however you would like — stipple, straight lines, or make up your own.

Key Chain Purse

For the cell phone pocket, cut another piece of fabric, 8 1/2″ long x 4″ wide.  Fold the fabric, wrong sides together, so that the 2 4″ edges meet at one end.  Sew a line of stitching next to the folded edge.  Then sew another parallel line of stitching, 3/8″ away from the first line.  This will form the channel for the piece of elastic.

Key Chain Purse

Feed the elastic through the channel and secure the elastic at each end of the channel with a tacking stitch.  Your fabric will now have a slight gather across the top.

Key Chain Purse

On the opposite end of this pocket, where the 4″ edges meet, sew a few lines of basting stitch 1/4″ and less from the raw edge.  You’ll use this stitching to slightly draw up the end of the pocket.

Key Chain Purse

Lay the quilted back on the table with the folded edge to your left and place the gathered pocket on top and to the bottom of the back so that there is a 1/4″ overlap along the left side.  Press that 1/4″ overlap around the folded edge of the back.  Slightly gather the basting stitches on the bottom of the pocket until the pocket is the same width as the quilted back.  Secure with a few pins and set aside.

Key Chain Purse

Purse Front:  Cut a piece of fabric 7″ long x 5 1/2″ wide.  From a piece of paper or cardstock, make a little window template that measures 1 3/4″ wide x 3″ long.  Place the window template on one end of the fabric, 1″ from the end and centered width-wise.  Trace around the template with a pencil.  Draw another window 1″ from the other end of the fabric.

Key Chain Purse

Draw another, smaller window 3/8″ in from each edge of the larger window.  Cut out the smaller window and then clip the corners of each window up to the outer lines.

Key Chain Purse

Turn the fabric over and press the 3/8″ edges to the inside of the window, folding along the pencil line.

Key Chain Purse

Fold the two windows, wrong sides together, so that they meet each other and press.  Slip the piece of vinyl between the two windows and secure with pins.

Key Chain Purse

Take the window to the sewing machine and topstitch close to the edge to secure the vinyl between the two windows.  Set aside.

Key Chain Purse

Now you need to make a piece of fabric that will go behind the window to form a pocket to hold an ID.  Cut a piece of fabric 5 1/2″ wide x 6″ long.  Place the piece of wonder under along the wrong side of one end and press.

Key Chain Purse

Peel the paper off of the wonder under, fold the end of the fabric over the wonder under and press again.  Now you will have a little wonder-undered sandwich of fabric.  Set aside.

Key Chain Purse

Assembly:  Take the 6″ long piece of steam-a-seam and cut it in half horizontally.  You will now have two pieces of steam-a-seam that are 1/4″ wide x 6″ long.  Flip the purse back over and press the steam-a-seam along the edge where the cell-phone pocket wraps around the folded edge of the back.  This is a little tricky, as the quilted piece will try and slip away from the folded edge that overlaps it.

Key Chain Purse

Peel the paper off of the steam-a-seam and center the purse back along one edge of the zipper and press until the purse back is adhered to the zipper.  This will help hold the fabric in place along the zipper until it can be stitched.  Repeat this step for the window piece, placing the steam-a-seam along the folded edge of the window piece and ironing the window piece to the other side of the zipper.  Be careful not to place the iron on top of the vinyl or you will have a sticky, gooey, melted mess.

Key Chain Purse

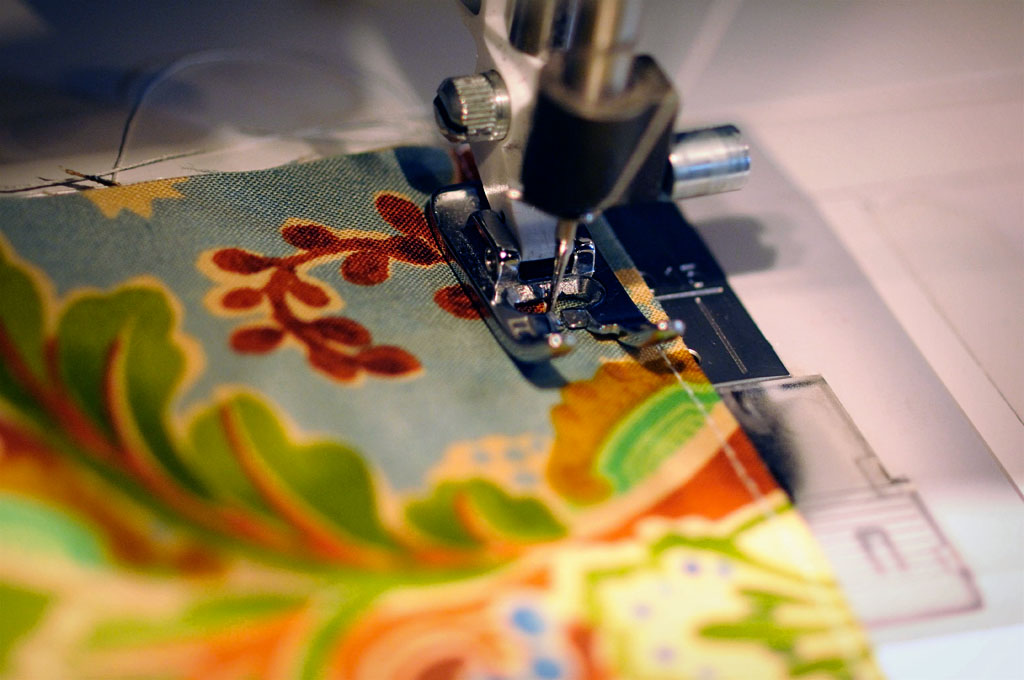
Stitch both the front and back pieces to the zipper, using your zipper foot and stitching closely to the edge.  You might need pins to help keep the quilted back piece tucked up into the edge of the cell phone pocket, so that the stitching will catch the quilted edge.

Key Chain Purse

For the little key-chain tab, cut a scrap of fabric 1 1/4″ wide x 1 1/2″ long.  Fold in 1/4″ on each long side and press, then fold wrong sides together and press again.  Stitch along the folded edges to hold the fabric together.

Key Chain Purse

Fold the little tab in half and pin along one edge of the window front, about 1 inch down from the zipper.

Key Chain Purse

Oops!  We forgot to place the wonder-undered sandwich of fabric behind the window to form the id pocket.  Ideally, you would do this before you attach the window half to the zipper, but you can do that now.  Place the pocket on the back side of the window, so that the pocket overlaps the top of the window.  If the raw edge of the pocket is longer than the window piece, don’t worry, you can trim it later.  The folded edge of the pocket will run along the edge of the zipper, but not necessarily right up to the zipper.  Pin the pocket in place.

Key Chain Purse

Flip over and stitch approximately 3/8″ from the edge of the vinyl on three sides of the window, leaving the top edge open.  Start and end up against the zipper.

Key Chain Purse

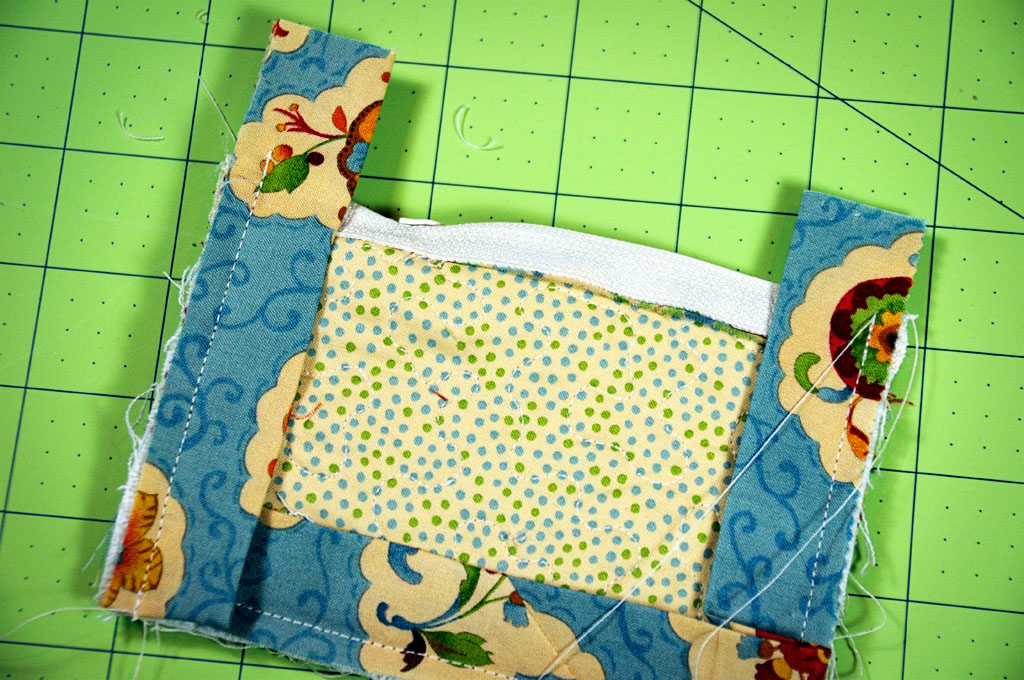
Fold right sides of the purse together, with the zipper forming one edge and stitch a 1/4″ seam along the three non-zipper edges.  Be careful when stitching across the zipper on each end — I like to use the hand wheel on my machine and take it slowly so the needle won’t hit the zipper teeth.  (Make sure you have unzipped the zipper at least 1/2 way before you stitch the 1/4 inch seams or you won’t be able to turn the purse when you are finished.)  Trim the ends of the zipper off.

Cut a binding, 15″ long x 2″ wide.  Press binding in half, length-wise, wrong sides together.  Sew binding around raw edges of purse, leaving tails at the zipper edge.  You can find instructions for how to sew the corners HERE — I did this binding just like you would a quilt binding.

Key Chain Purse

Wrap the binding around to the opposite side, tuck the tails in, and stitch the binding down.  I just left my tail ends raw since they’ll be protected inside the coin purse, but you might want to give them a prettier finish.

Key Chain Purse

Turn the little coin purse inside out, attach a key ring on the tab, stick the ribbon through the hole in the zipper tab and Voila! you’re finished!  (Note:  The corners will not pop out perfectly square because of the bulk of the binding.  This doesn’t bother me, but if it bothers you, you might want to make a bias binding and make rounded edges to your coin purse.)

Key Chain Purse

So, that’s it.  It seems long and involved, but each step actually goes quickly, and it doesn’t take very long to make one of these little purses.  Make more than one while you’re at it.  If you make any, let me know — I’d love to see them.

Have a good week!
XOXO,
Anna