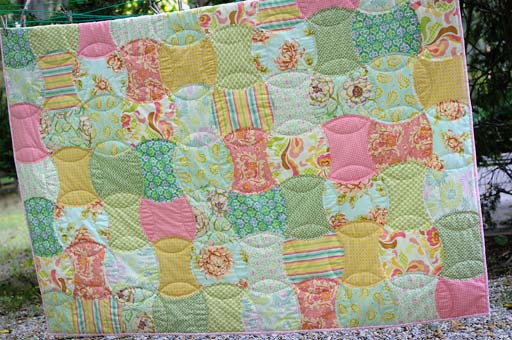
Thanks for all the Applecore quilt love! This is really a pretty easy quilt to put together, if you get the template right. The trick is to get the length of the convex curve to match the length of the concave curve.
The very easiest way to make an applecore quilt is to buy your applecore pieces already cut out for you. But, that’s not always practical — you might want to use your own scraps, or you might want to make an applecore quilt in a size that’s not available in pre-cut pieces. The next easiest way is to buy a plastic template, but you still have the issue of templates probably not being available in all sizes. So, for my money, the best way is to make your own template. Some of you probably already know how to do this (Annalea spelled it all out just the way I do it, except for the last few steps, in the comments section of part 2!), but for those of you who don’t know how, here are a few pictures to help you along.
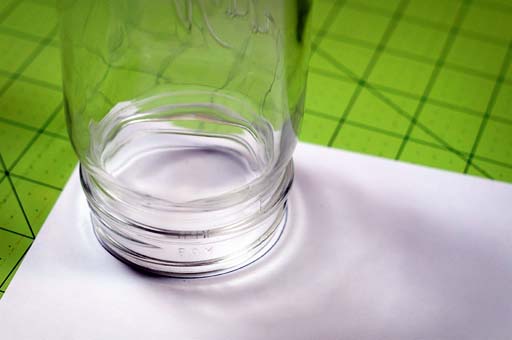
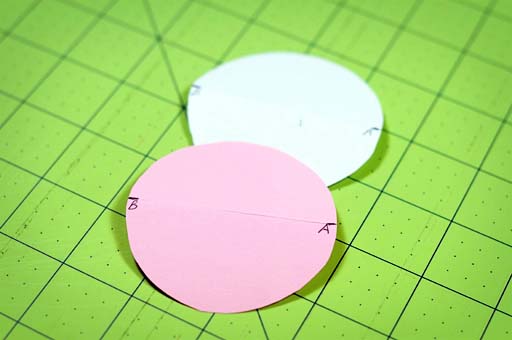
First, you have to determine how long you want your applecore to be. (My jumbo applecore was a little over 10″ long.) Then find a circle that has a diameter equal to that length. Look all around you for circles — cans, dinner plates … heck if you want a really jumbo applecore, run outside and trace the circumference of a car tire! For our little sample, I’m using a canning jar. (And please ignore my funny green cutting mat and try to remember that I sew in a dungeon — thus, no natural light!)
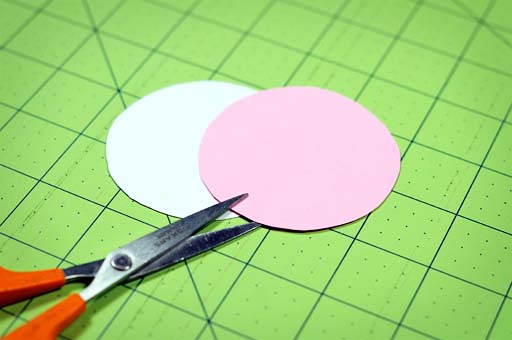
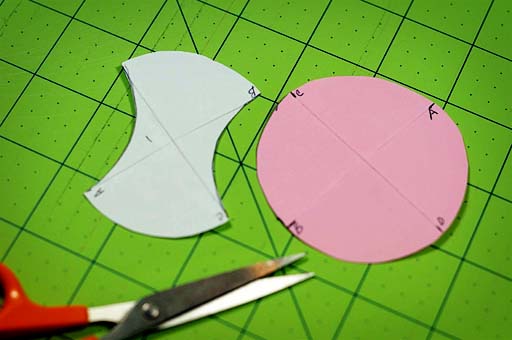
Trace around the jar and cut out your circle. Then make another identical circle — I’m using a different color of paper to make it easier for you to see what we’re doing.
Fold both circles in half.
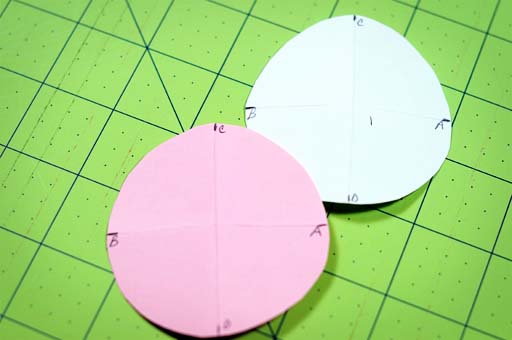
Unfold your circles and label the endpoints of each line. This step isn’t really necessary — again, I’m trying to make it a little easier to explain this process.
Fold the circles in half again, by bringing the A to touch the B, and mark the endpoints of the new lines.
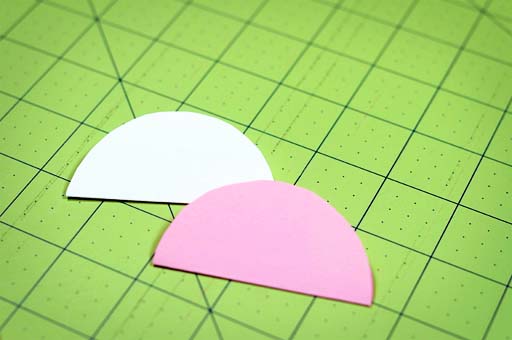
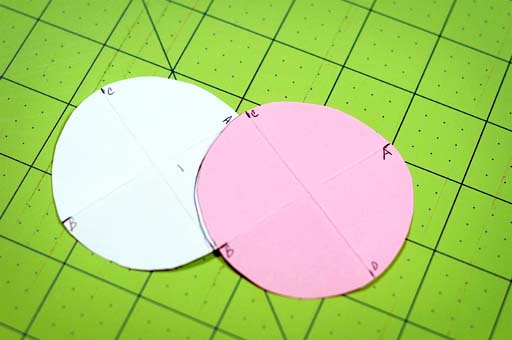
Now, your circle is divided into 4 equal sections. Place the pink circle on top of the white circle and match up the white A to the pink C and the white D to the pink B. You can match up any group of points, as long as your circles look like the ones in this picture and your folded endpoints are touching. Then trace the curve of pink C to pink B onto the white circle.
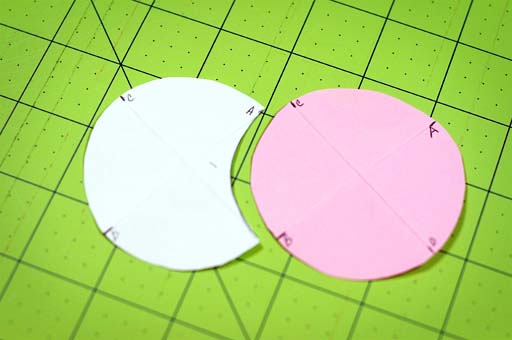
Cut the white circle on the traced arc.
Repeat this process for the other side of the circle and voilà, an applecore!
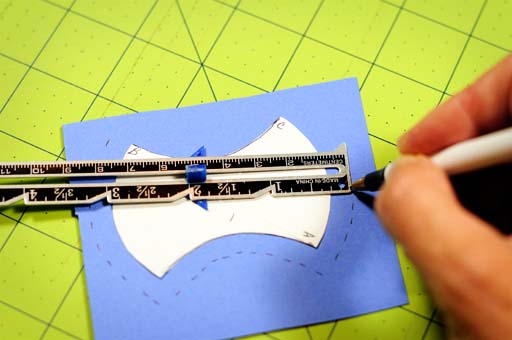
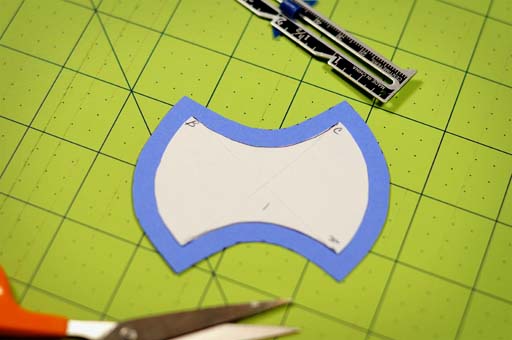
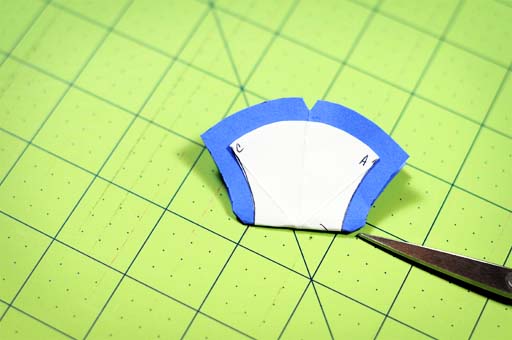
Now, the most important part — you have to add your 1/4″ seam allowance. Glue your template to another piece of paper and mark a 1/4″ seam allowance on all sides of the applecore.
Cut along this new line and and voilà again … a template!
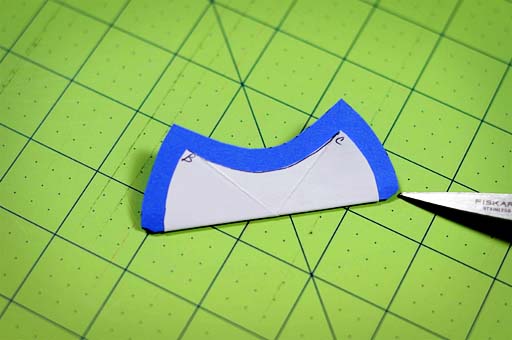
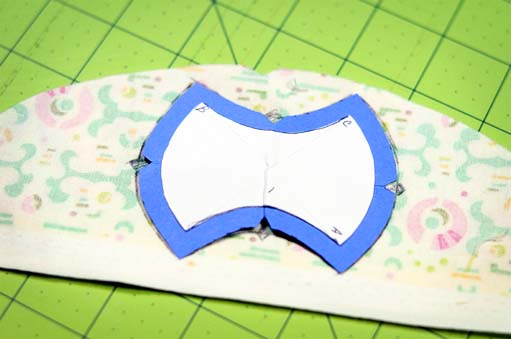
One more thing that I find very helpful is to mark the center points on each arc, so that you can match them up when sewing. Fold your applecore in half lengthwise and clip a little v into the edge of the template on each end.
Repeat this process for the concave sides of the applecore.
Your template is ready to use! Now, I know … those of you in the zoom, zoom age of rotary cutters aren’t going to want to have to deal with this old fashioned template method. “But, it takes too long” — I can hear you now. Quit yer whinin’! Expand your horizons! This way really can be fun and even … dare I say it … relaxing. Trace around your template, onto your fabric, being sure to mark those midpoints.
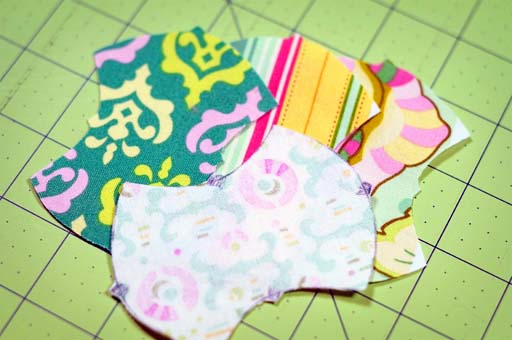
My jumbo applecore has 90 pieces in it — I traced and cut on 4 layers of fabric at a time and it only took me about 90 minutes to get them all cut out. So, here are our little samples.
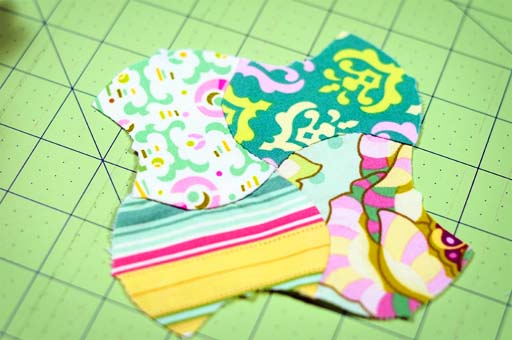
And here they are all sewn together.
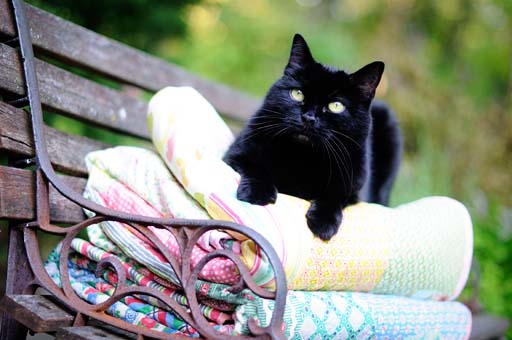
So, there you have it, in case you’re interested in making an applecore quilt in any size. And if you’re really lucky, when you’re all done, your quilt will be kitty cat approved!
XOXO,
Anna

Penny, “Andy, look what Jean is doing. She took the tire off of her husbands car.”
Andy, “Good grief, what is she up to?”
Penny, “I’m not sure. She’s tracing it on a very large piece of paper.”
Andy, “There goes the neighborhood!!”
Thank you so much for sharing this. I really like the design.
I had no idea the applecores on your quilt were so big. That is so cool. I’ll send you a stack of fabric and I’d like you to send it back, cut into applecores. Better yet, stitch them together, THEN send them back!
:waves madly
p.s. thanks for the wonderful tutorial.
Now, you made that look really easy! The idea of sewing (and pressing!) all those curves neatly does rather frighten me though …
thanks for your tutorial, I really enjoyed reading your extra commentary, I think all patterns should have this attitude, it would really enhance them I think :)
I need to get my head around the stitching and pressing of the curves – do you snip the curves or do you find that they find a natural way to lie?
it ONLY took me about 90 min. Love it. Thanks for the tutorial. I love that you were so considerate to put in a lot of details.
All that math! And you make it look so easy. :-)
That’s such a beautiful quilt. My mother has done some quilting in her time and I know what a labour of love it is. Really something to treasure.
Anna, those quilts are absolutely stunning!! Thanks for the great tutorial. When I feel brave enough I’ll give it a go!
xxx
Thank you, I love to know how to draft a pattern in any size. How do you tackle the curves, I assume you sewed these on the machine? Do you leave the s.a free? I just need to hear that it’s easy, lol.
Great tutorial.
Anna, You are such a good instructor! I love the apple core pattern (never used to) and you fabrics are so pretty too. Sophie and Sabrina say Meow to Paul :)
Oh, those curves. I have a headache just thinking about sewing all those curves! But your apple core quilts are so pretty… it might be worth a try. I could start with apple core placemats or something… :) Thanks for the wonderful tutorial. You certainly have made it look easy.
I think I would not do well with making the templates, I don’t have the patience to stick with it. Let alone that, I don’t enjoy sewing curved seams either. I think I’m a self-described quitter before I even start, lol.
The quilt surely is pretty!
Looks easy-peasy!! I may very well have stuck it out in my sewing class if you’d been my teacher.
:)
I love your tutorial! Sounds like a great way to do it if you do not have the means to get them pre cut. I don’t know if I told you this but your kitty looks like my kitty. I often get the kitty seal of approval too.
I never aspired to an applecore quilt. But after seeing yours, and reading the easy instructions, I’ve added it to my list! Many thanks!
Thank you for the tutorial, Anna! Very detailed. I need that. LOL. Maybe someday I will attempt an applecore quilt. Maybe. :)
You are a genius! Pure and simple genius. BEAUTIFUL!
Thank you, thank you for the tutorial. My oldest daughter has a love affair with apples (eats 1 a day, at least). What a perfect quilt for her.
Looks like I have my first quilt project….CAN’T WAIT!!!! Thanks so much for the inspiration AND instruction!!
And this, in a nutshell, is whay I love a straight line seam. You are amazing (and I am not worthy)!
Wow! You make it look so easy. Tiny little applecores are extremely cute.
I’ve loved your applecore quilt series. Your tutorial is a lovely way to help us understand how to make such a quilt ourselves. Thank you for sharing this adventure and the tutorial with us.
I don’t quilt, but I’m interested in learning some day and found your tutorial fascinating. Your kitty has excellent taste– I want to wrap myself in that quilt! It looks so soft and cozy, plus the colors are scrumptious.
Great tutorial! Thanks for that. I love the last picture and that your quilts get inspected with a “cat scan” :o)
Well, dang! I can do that! You. Are. A. Genius. :)
Now to find some cute fabric and a really big circle.
Thanks for the fantastic tutorial! You make it look easy.
Very good instructions, you clever girl!
What a great tutorial Anna- It really is a pretty pattern and I had not seen how they were set together in sets of 4- didn’t really think about how they would go together.
Thanks for sharing,
Anna
Hey, thanks for making it seem so easy….ahh I am talking about me:) I actually get these directions. whoohoo, saved under tutorials. Thank you. I just love the look of this quilt and appeciate your wonderful and easy to understand directions:)
Brilliant! I know I could do that, but I would probably never spend $$ on the templates! Great post Anna – Thanks for sharing!
Thank you so much! I have always wondered how that pattern was formed and put together! You Are A Genuis! you made it so clear and looks like something even I can try. Thank you again for sharing with us, it was so generous :0)
Wow!! I had just thought the quilt looked great – I hadn’t even thought about fitting all those curves together – tricky!!
Anything Kitty approved is supposed to be great right? Mine loves all fabric and yarn. he really is a yarn whore :*
I love the apple core quilts! It looks like a lot of work but a lot of fun. I am looking for some good ideas for a baby quilt or two. This might be one.
I think the quilt project here just may have just jump started my creative motor! I love the quilt and the tutorial. You make it look so easy!
Thank you for the inspiration!
Anna, I just don’t know how you do it. Such an amazing skill you have with these quilts. I find this one especially gorgeous. Plus, you said “convex curves” which is great. I think I will use this to describe my figure. It makes it sound exotic rather than annoying.
I LOVE your quilt. I LOVE your fabrics. I LOVE your colors. I LOVE your tutorial. I LOVE your photos. I LOVE that you say, “a pretty easy quilt to put together”.. I LOVE that you crack me up! I LOVE that think I can do it, and I’m gonna try. Thank you!
I LOVE IT. And I’m not just kissing up to you before you write next month’s schedule. xoxo SW2
Anna, you are just SO smart. Thank you for sharing all the steps with us. It really does help to plan before you start cutting, doesn’t it? (Sometimes I forget…….)!!
Love your applecore quilt and fabric choice, Anna. You would pick the perfect time of year for an apple core!! Thanks for the great instruction for the template too, old fashioned fun, yay.
I’ve wanted to try an applecore quilt for awhile and this tute is very helpful. I would be using the scrap bin, and don’t mind the old method of tracing…gotta go read if you hand stitched these or machine?
Great Tutorial! I love your extra large apple core pieces. They really show off those wonderful large prints!
gorgeous! love the colours so much and huge thanks for sharing how to!!!! I’ve ordered some applecore piecing papers but maybe that will take me forever!
I’m also saving all my pennies to get an accuquilt machine, i could be saving for a while but I imagine quick cutting and do have a store to justify it!!!!!!!!
Corrie:)
Thanks for the instructions on the applecore. I am going to have to give this a try.
Brilliant tutorial Anna! Thank you! And I love the idea of mini apple-cores! Lucy xx
Thanks a lot for the tutorial. Could you do one on sewing curves? When I cut out smaller pieces more than one at a time it seems to shift. How do you prevent this?
I doubt I would actually make an applecore template but I SUPER LOVE knowing how to do it! Thanks for the great tutorial.
Oh, dear Thimbleanna and your twin (or maybe triplets) that was so interesting and next time I have six months to spare…
It’s lovely, though!
What really fantastic tutorial instructions. I still dont think I will be tempted, but I love seeing your Kitty giving approval.XX
I love the quilts Anna. Very nice. Dont you just love those old 1930’s prints? I never get tired of them. And you hand quilt too?OF course you do. lol
Thanks for the great tutorial! I love your kittycat approval :)
You make it look so easy. Super tutorial!
What a great tutorial. It looks like the perfect project for those cold winter nights that are quickly approaching. Just might have to do a twin sized one for one of my daughter’s beds. Thanks so much for sharing.
Thanks Anna, lovely tutorial and great quilt!
Did you piece the applecores with the sewing machine?
I think this is a great project to sew by hand!
Love the kitttycat approval. Midas does exactly the same!
i have to ask the same thing…did you hand piece these? they are adorable. i may trace my car tires, LOL. you crack me up.